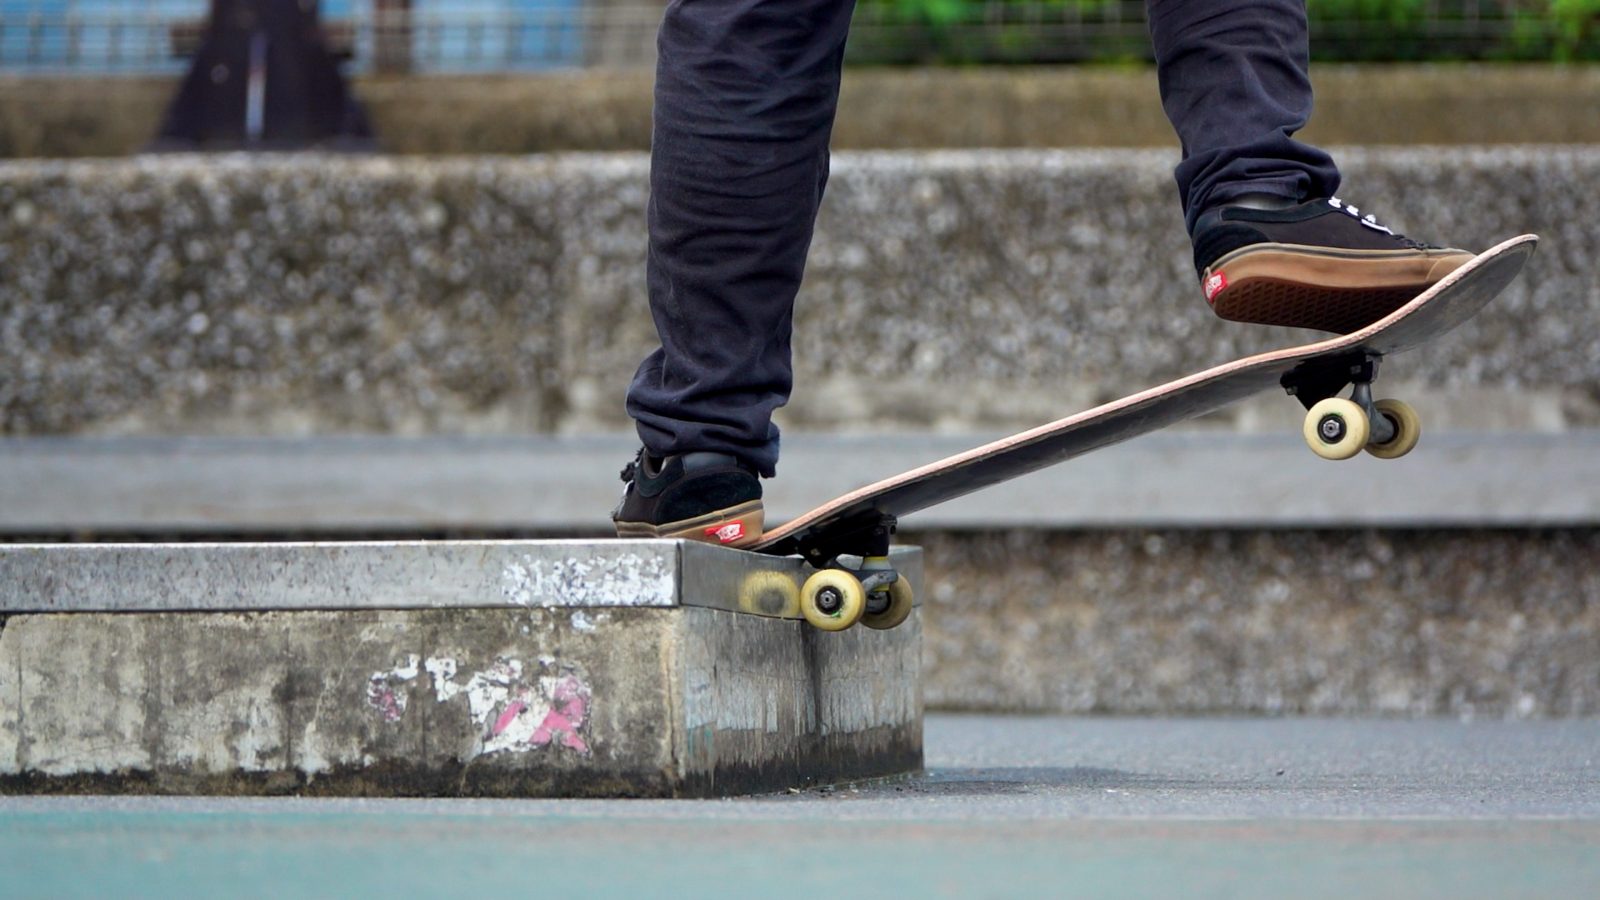
Slappy Noseslide. Everyone can do this trick without an Ollie. You will love the feeling of the deck being scraped by concrete right under your feet.
Understanding the physics of this trick will make it a whole lot easier. The biggest factor is the angle. While it is easier to hang the nose if you approach the obstacle at a right angle, in order to slide, you need to approach parallel to the obstacle. In this video, we will see how to lock in and how to progress into a slide in a Slappy Noseslide using 3D animations.
Instantly discover issues with your tricks and how to fix them.
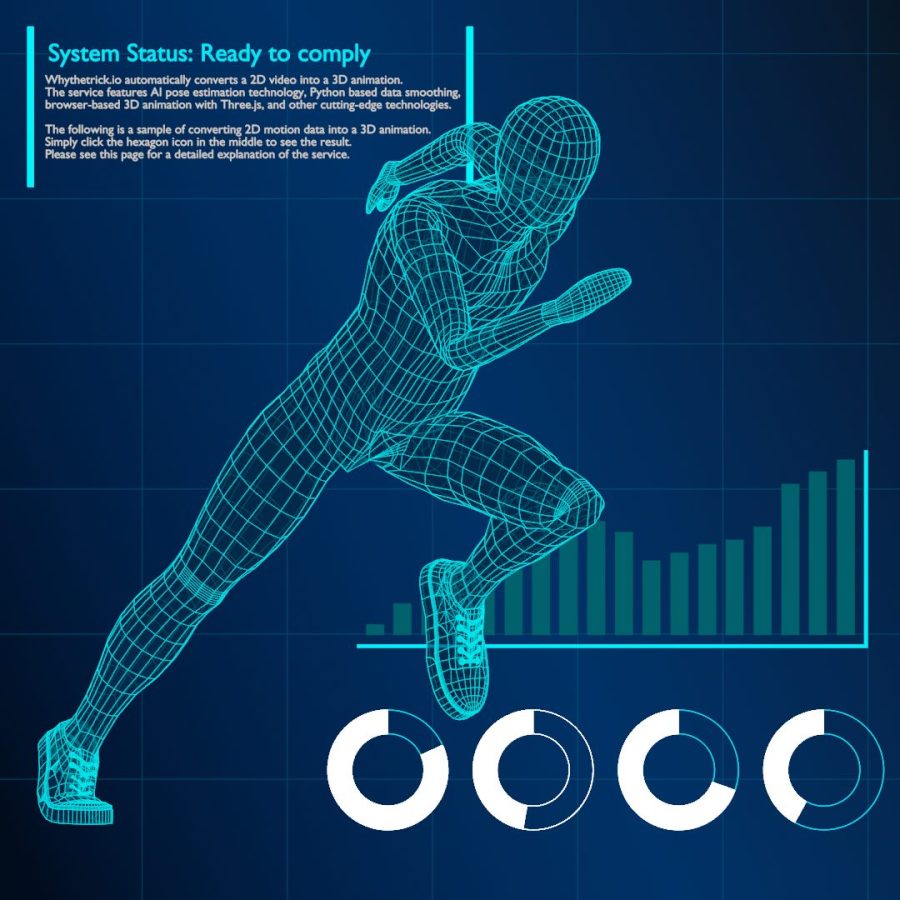
Deep analyze your motion with the cutting-edge technology.

Track your daily progress and ask questions to others.
Summary
Approach angle and Inertia
For a successful slide, it is important to approach nearly parallel to the obstacle. By rotating the board just prior to the ride, the board advances into the obstacle while the body has greater inertia and continues to move parallel to the obstacle. This timing is the key to success.
Note when hanging the board over an obstacle
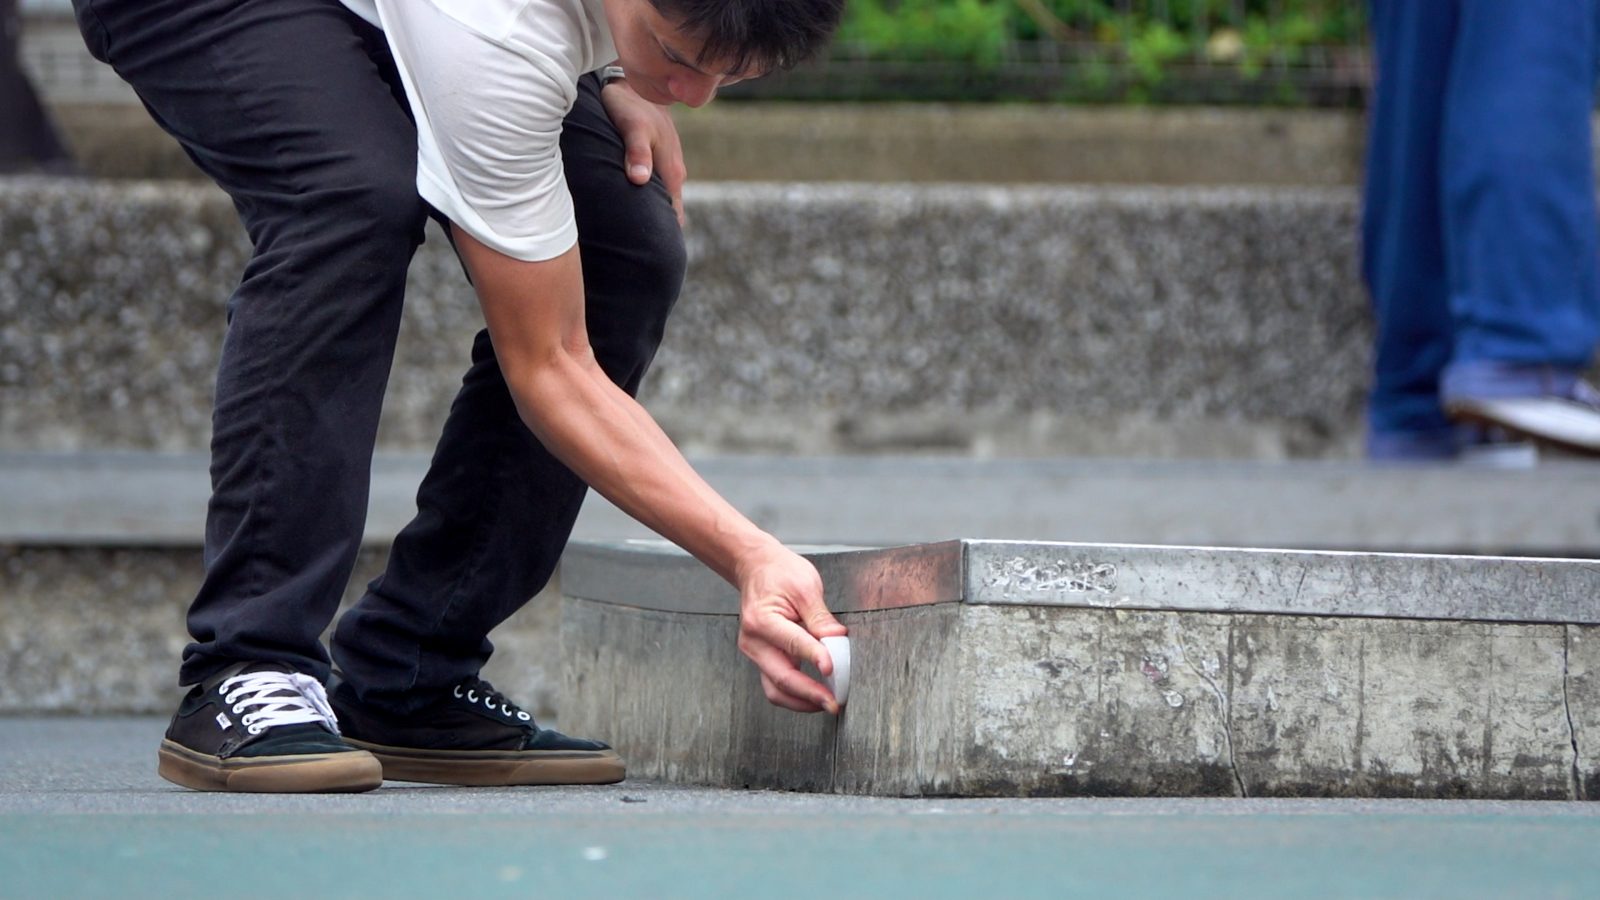
When you hang the nose over an obstacle, the heel side wheel and the nose touches the obstacle, creating strong friction. Waxing the base of the truck or the side of the obstacle will make it easier to slide, resulting in a smoother slide.
Frame-by-frame video player
To help skaters improve their technique, Whythetrick has developed the frame-by-frame player. This system is an in-depth analysis tool for instantaneous movements, designed to help skaters study and evolve their tricks, easily and free of charge.
Hanging the nose on the obstacle
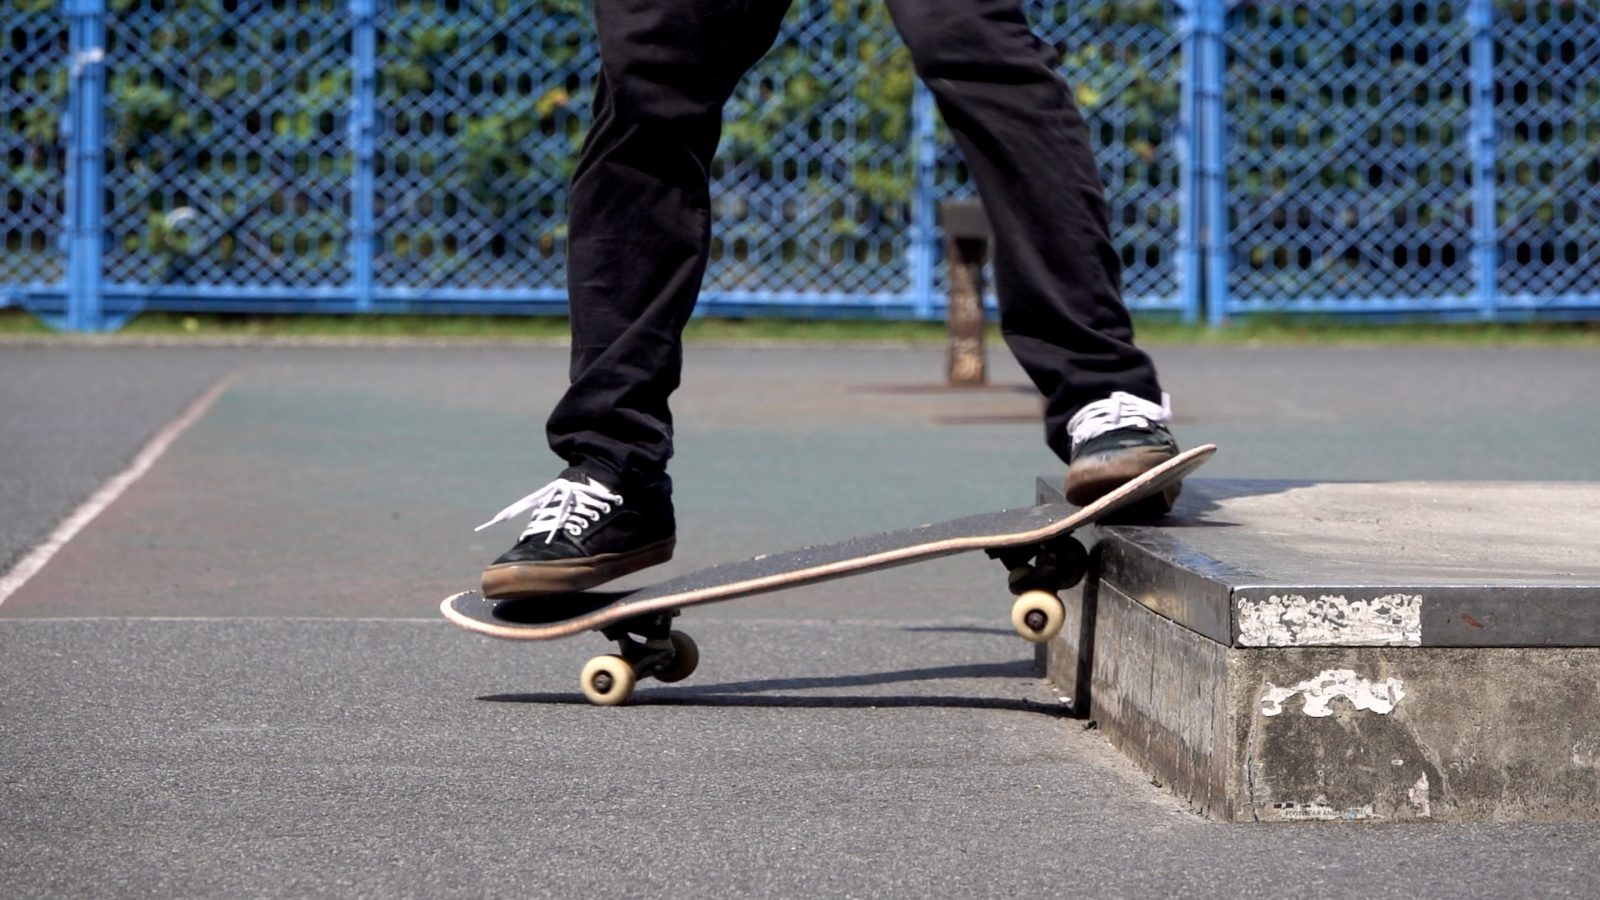
Before starting to slide, start by practicing locking the nose on the obstacle. Place your front foot on the nose and your back foot on the tail. Approach the obstacle at a right angle while doing a light manual. If you lower the nose at the right time, you should be able to get on the obstacle.
Note that this action is not 100% the same as shifting your weight intentionally. After the front wheels hit the obstacle, the kinetic energy of the body continues to move in the same direction due to inertia. This causes the weight to shift around the front wheels and ride up the obstacle.
By utilizing this motion, you can ride up obstacles of different heights, such as ankle-high curbs or knee-high obstacles. As long as the nose can reach the height of the obstacle when you step on the tail, you can use the same technique to get on it. Of course, it is safer to start with low obstacles.
Physics of Slappy Noseslide
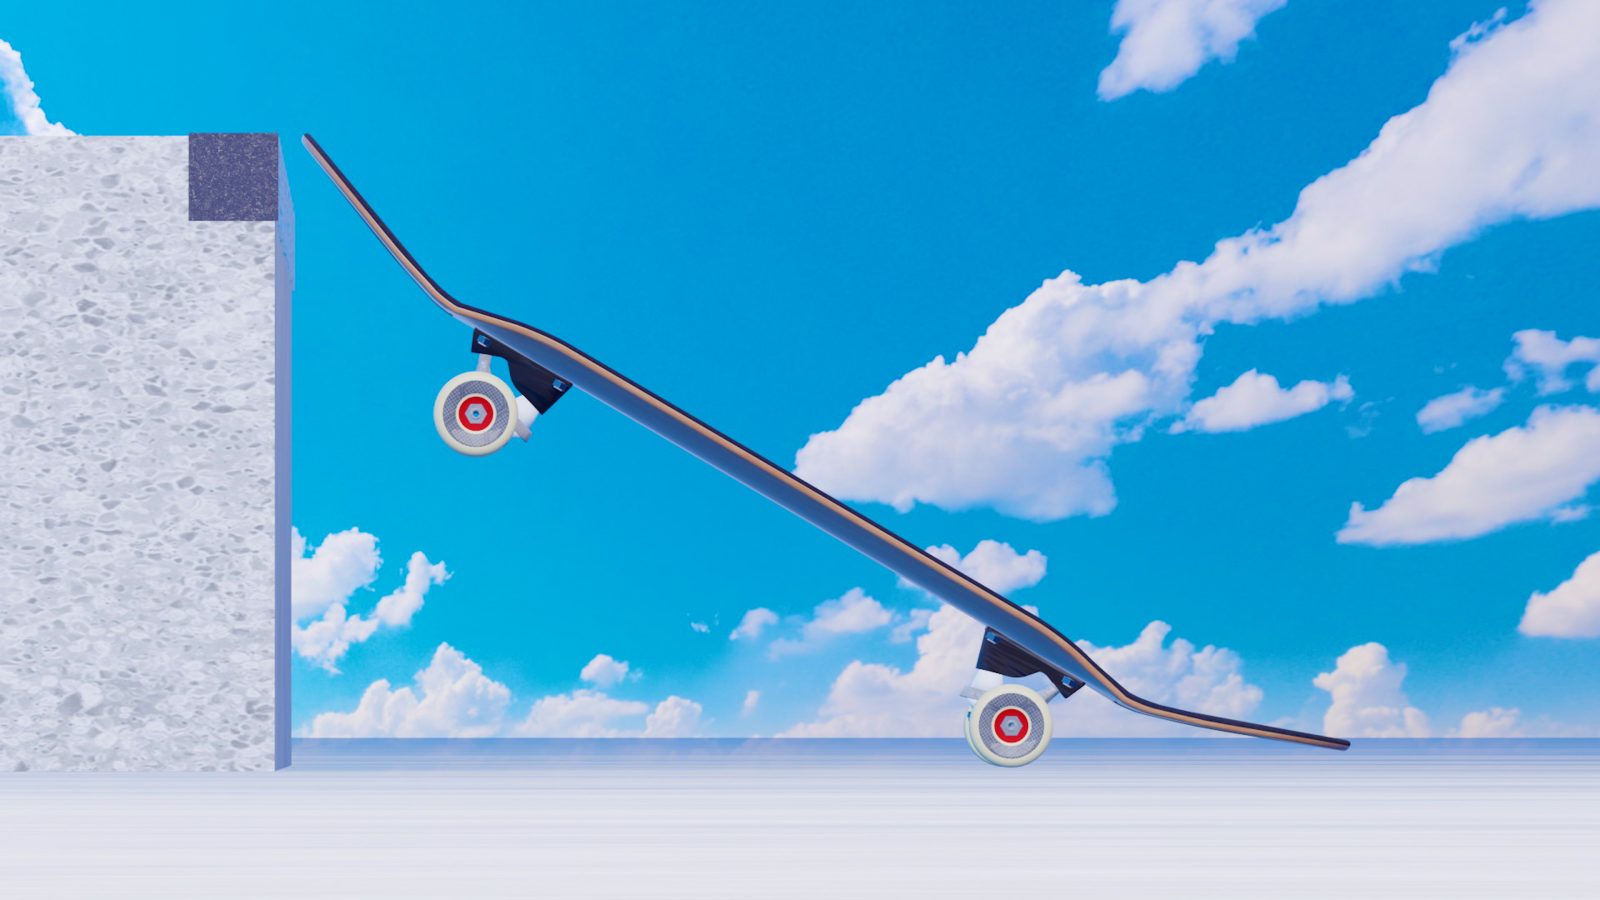
Note, however, that there is a difference between this practice and an actual Slappy Noseslide. In an actual Slappy Noseslide, your approach angle to the obstacle is pretty much parallel, and the board's angle as it rides over the obstacle is only about 45 degrees. At a small angle of 45 degrees, the surface of the nose that touches the obstacle becomes small, so you might think the board slips off, but there is a physical basis that supports this.
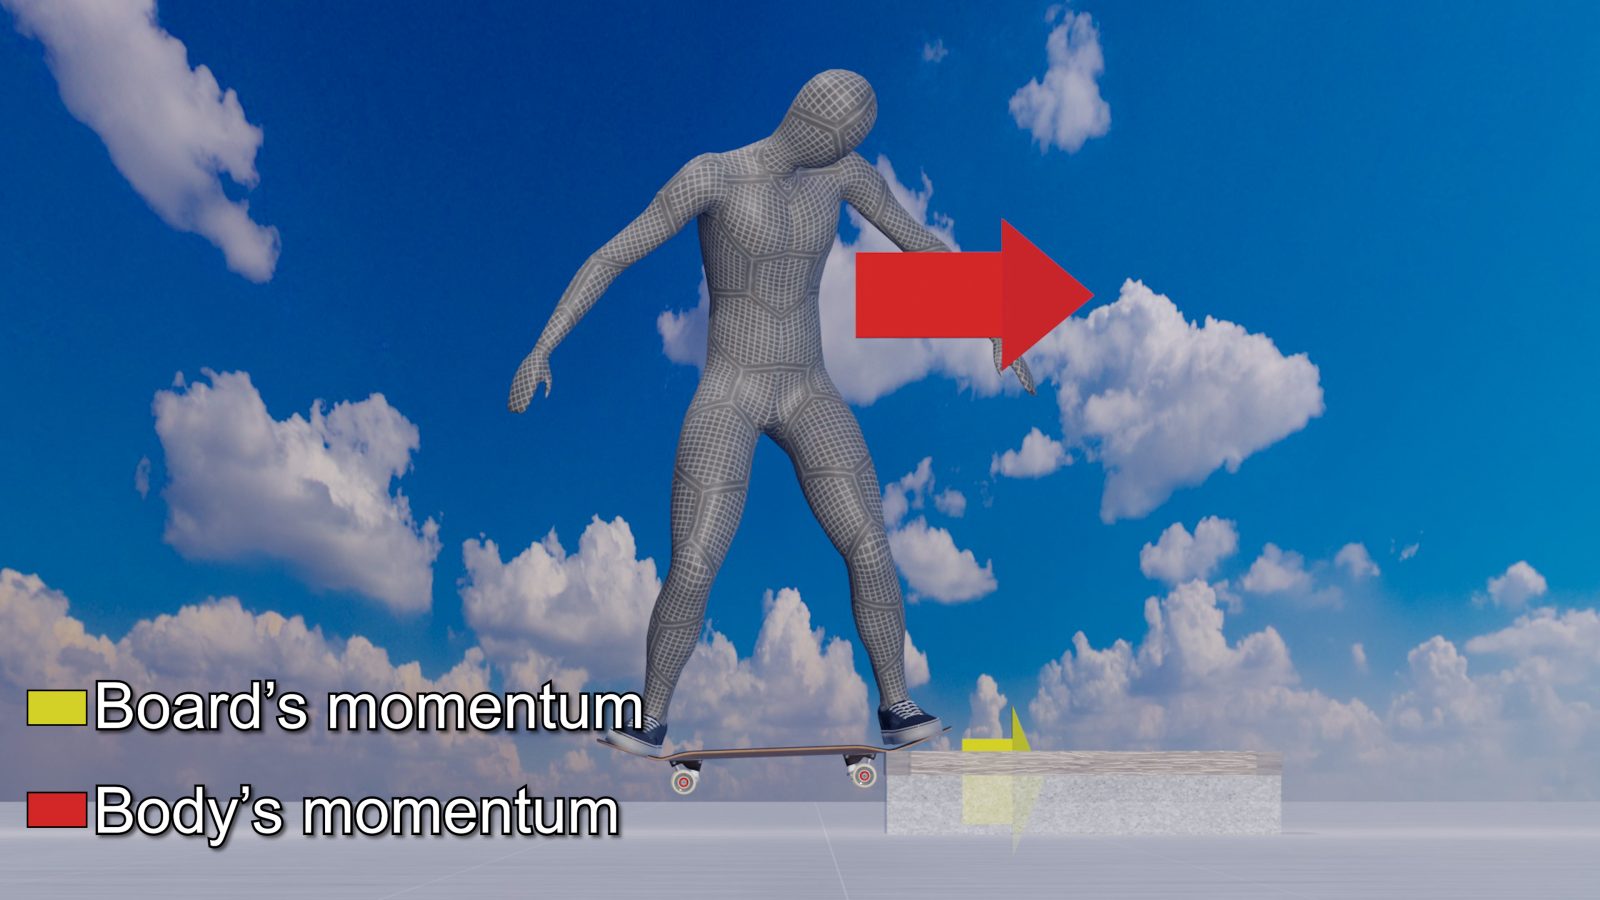
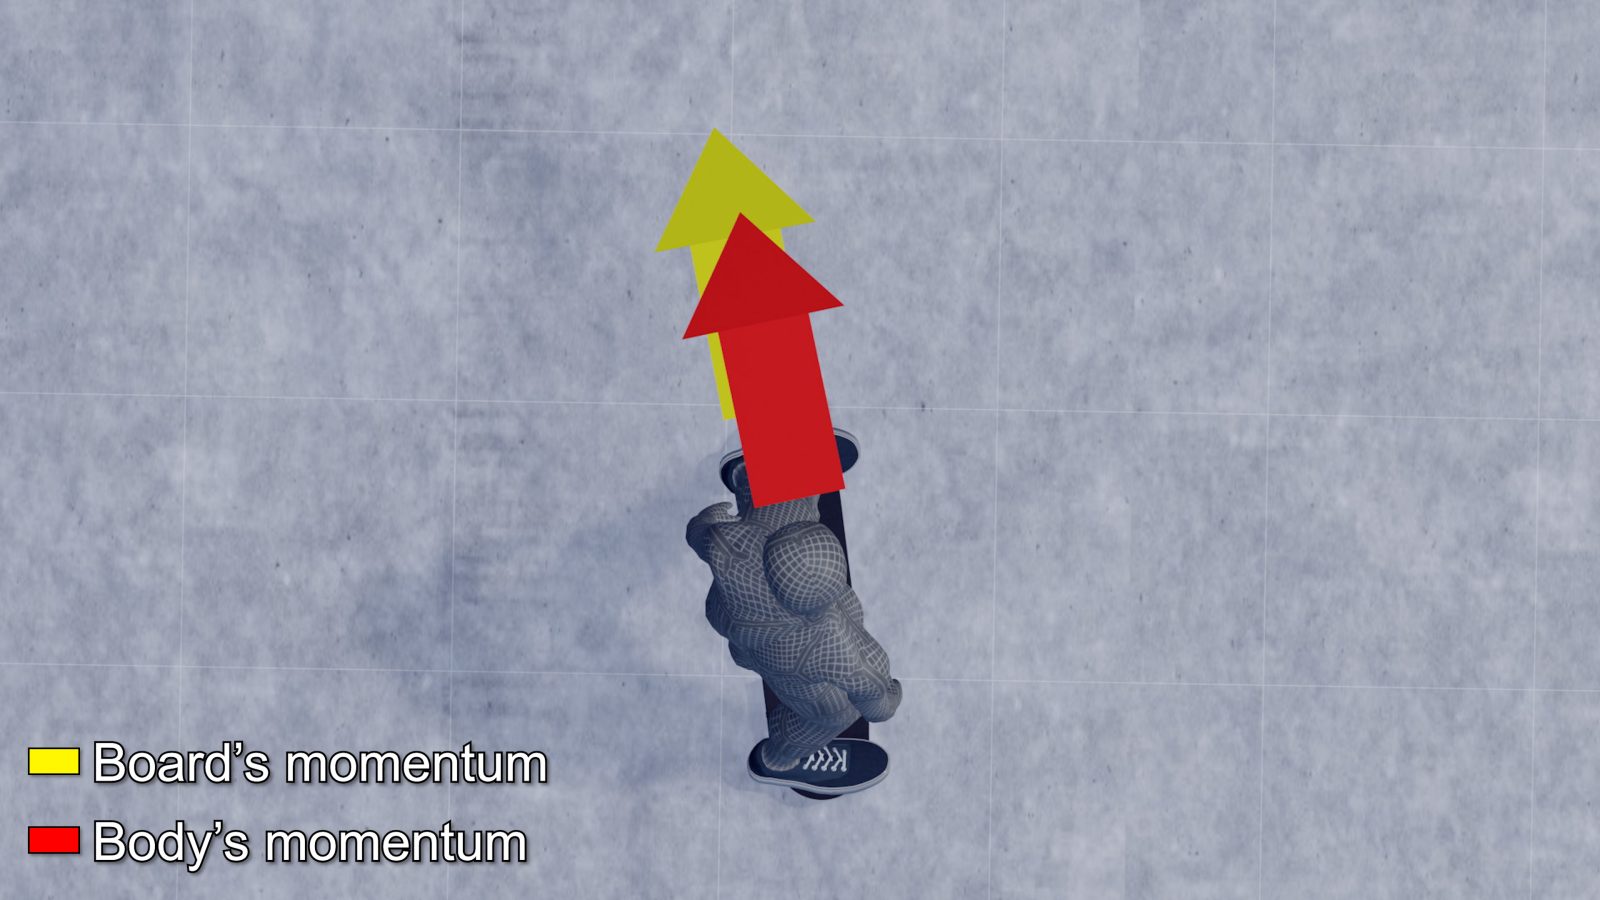
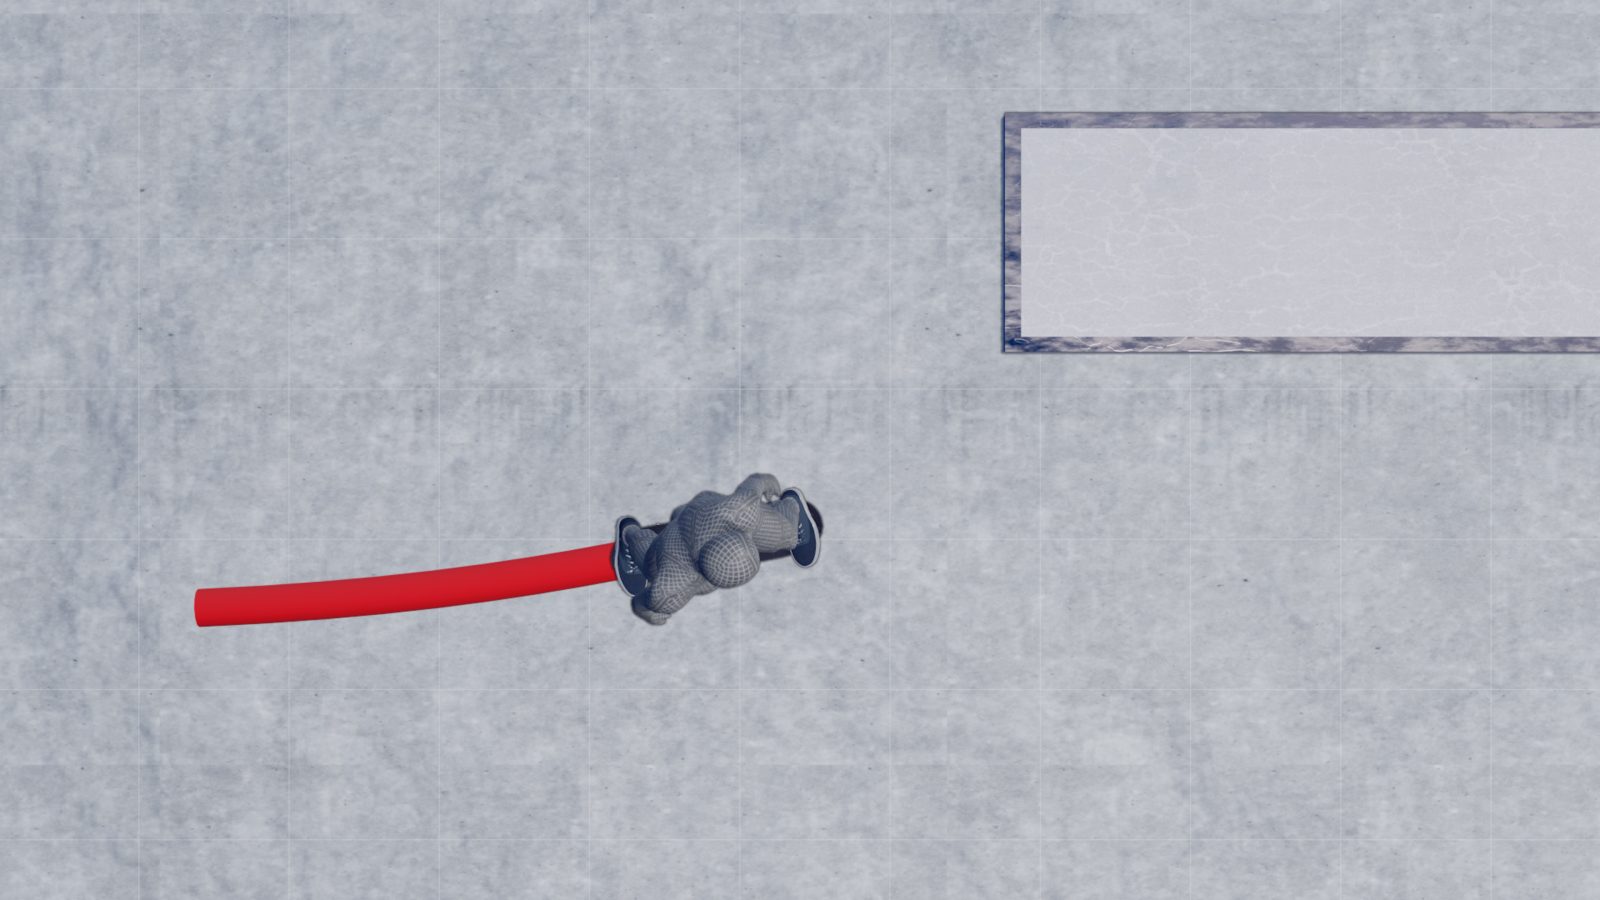
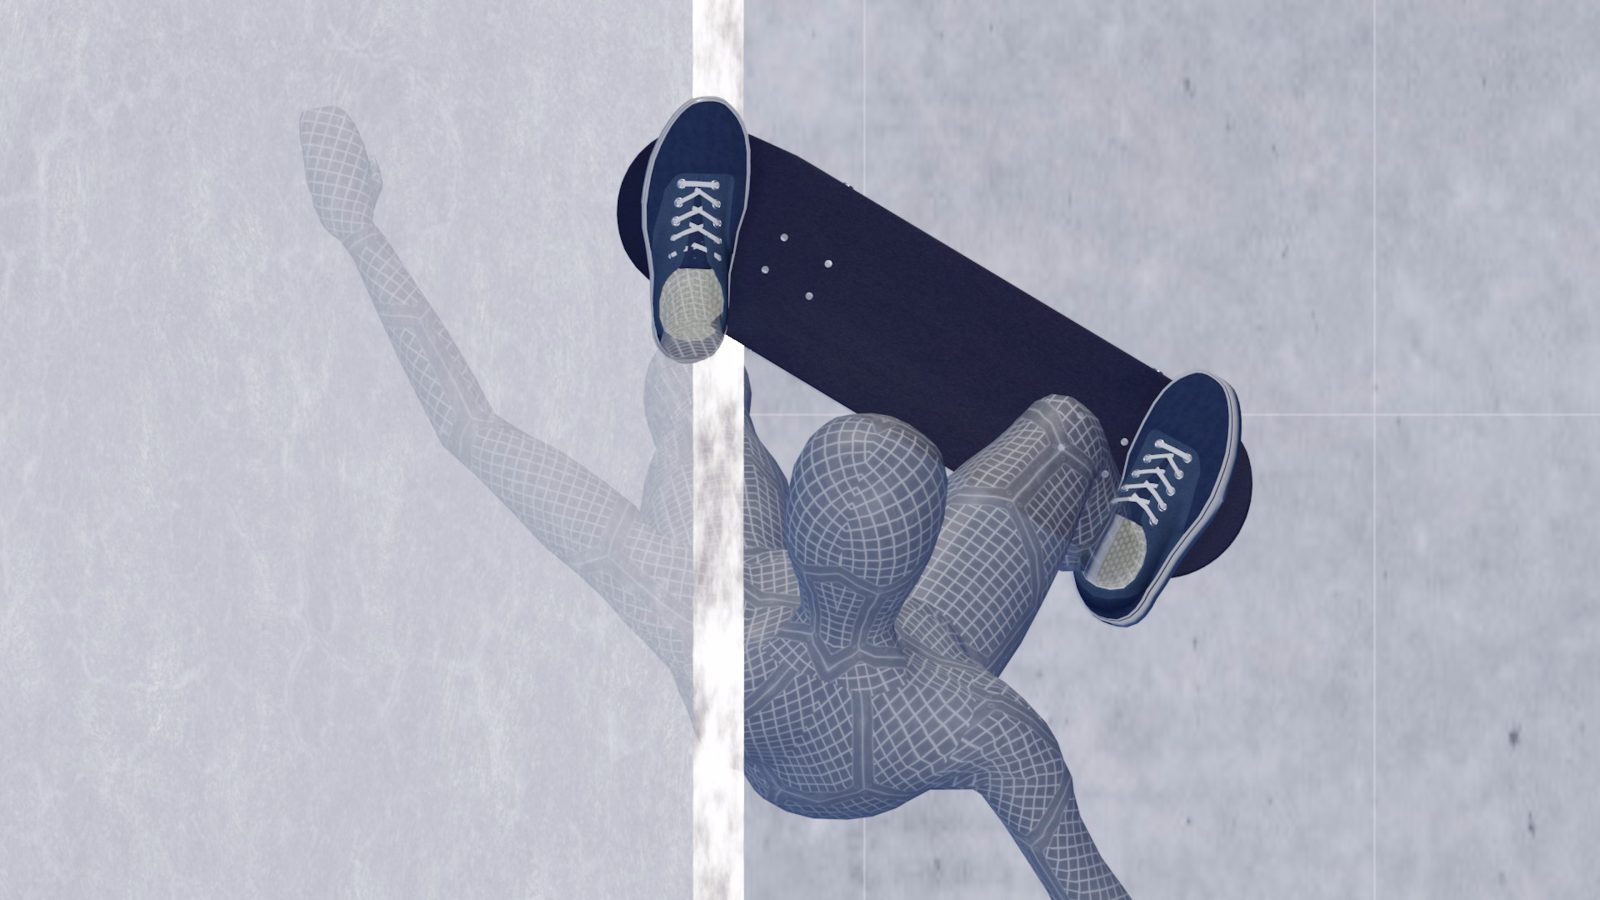
To solve this mystery, let's consider what happens in this trick chronologically. The body's momentum is described in red, and the board's in yellow. While approaching the obstacle, the board's center of gravity and the body are naturally moving in the same direction at the same speed.
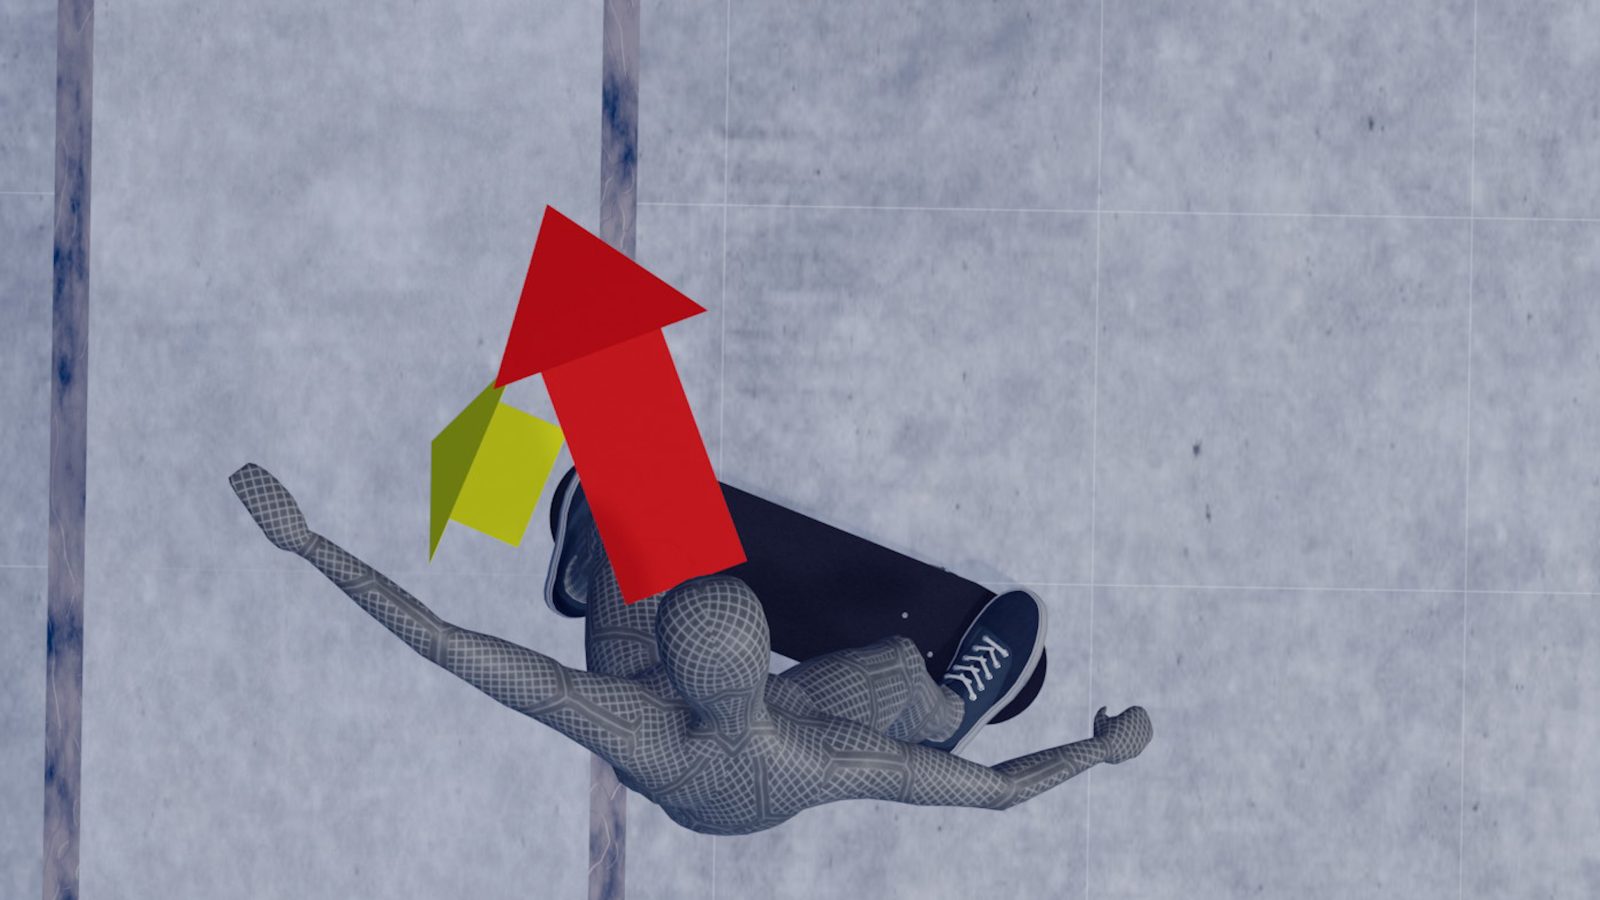
Just before the obstacle, the board changes its angle, and by the time it reaches the obstacle, the board has rotated about 45 degrees. As the board rotates, the body's center of gravity is also affected, and the body is forced to move toward the obstacle. However, because of the inertia of the body's center of gravity, the body does not move completely in the same direction as the board and continues to move closer to the direction of approach.
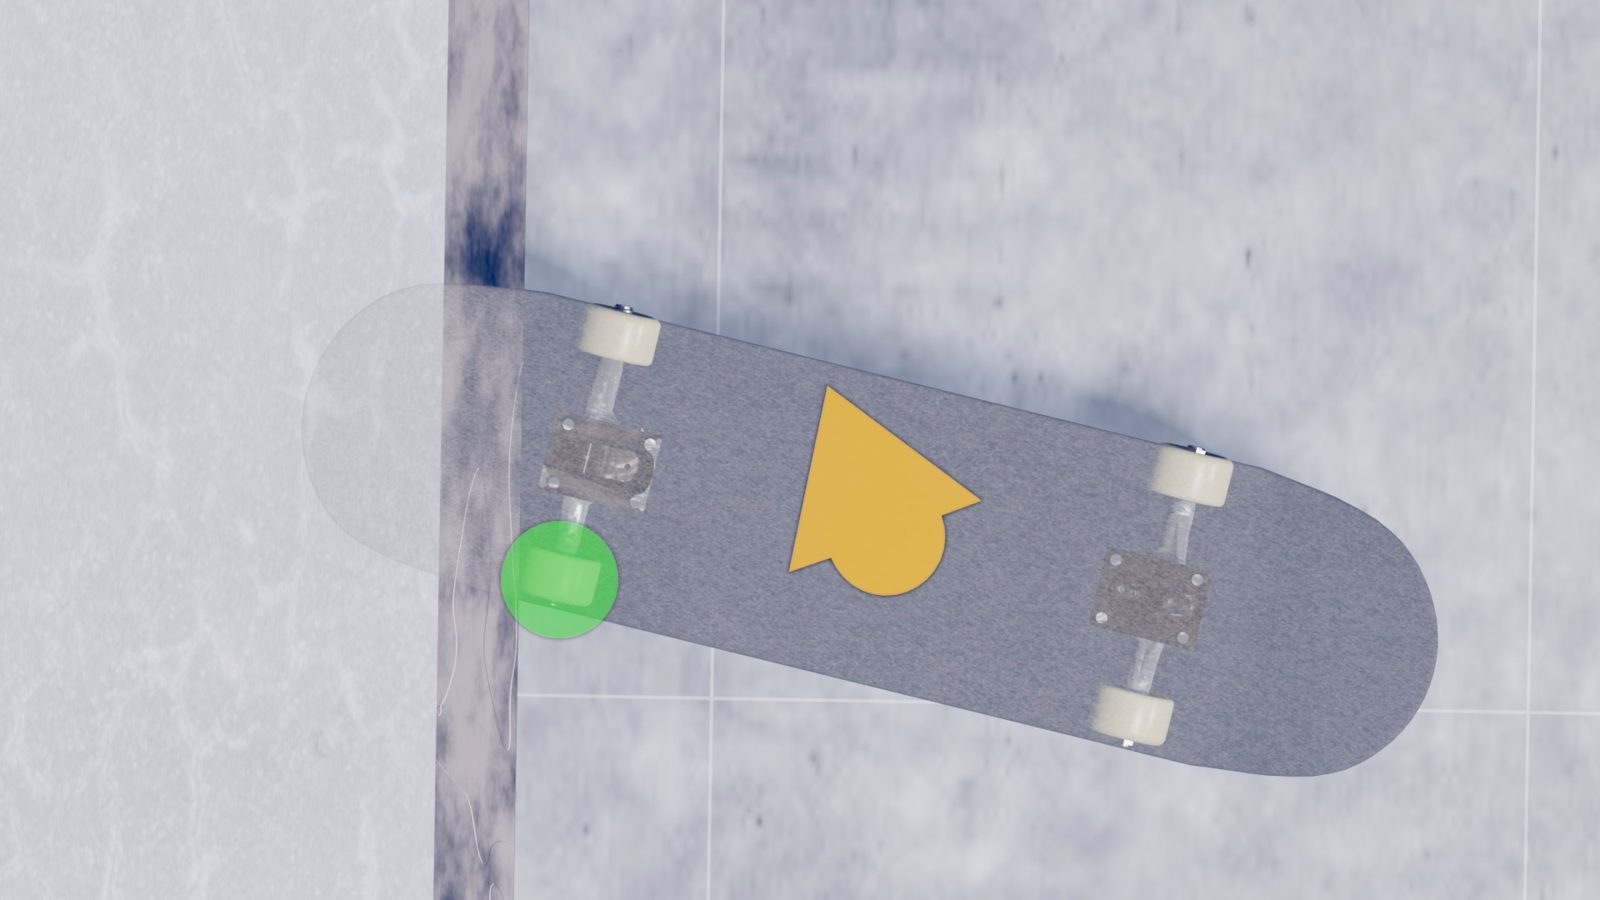
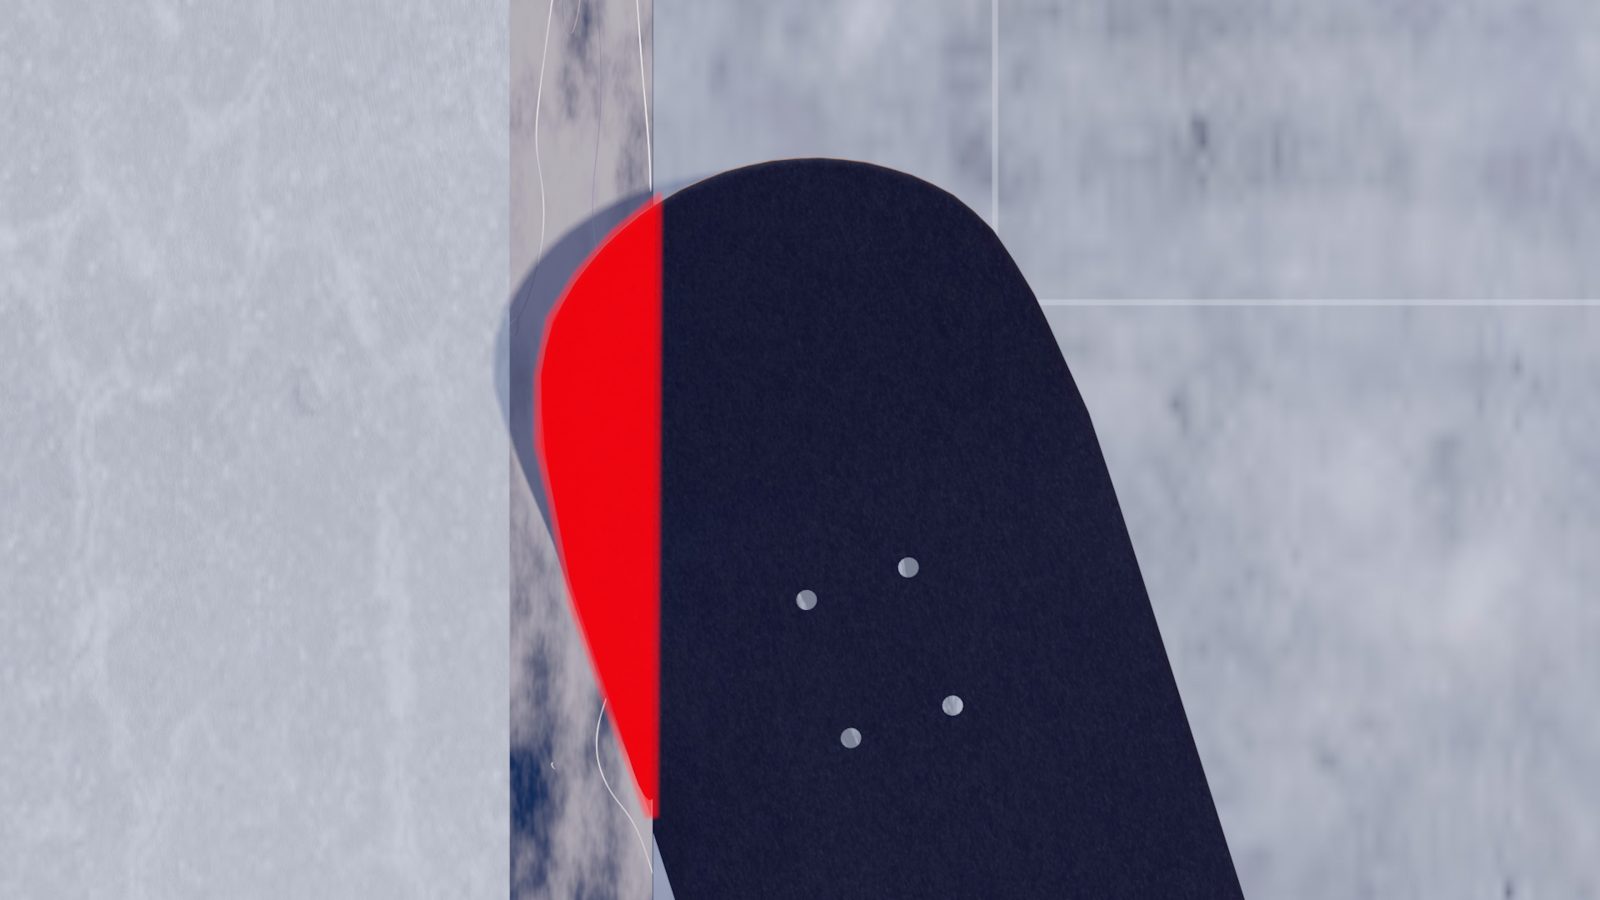
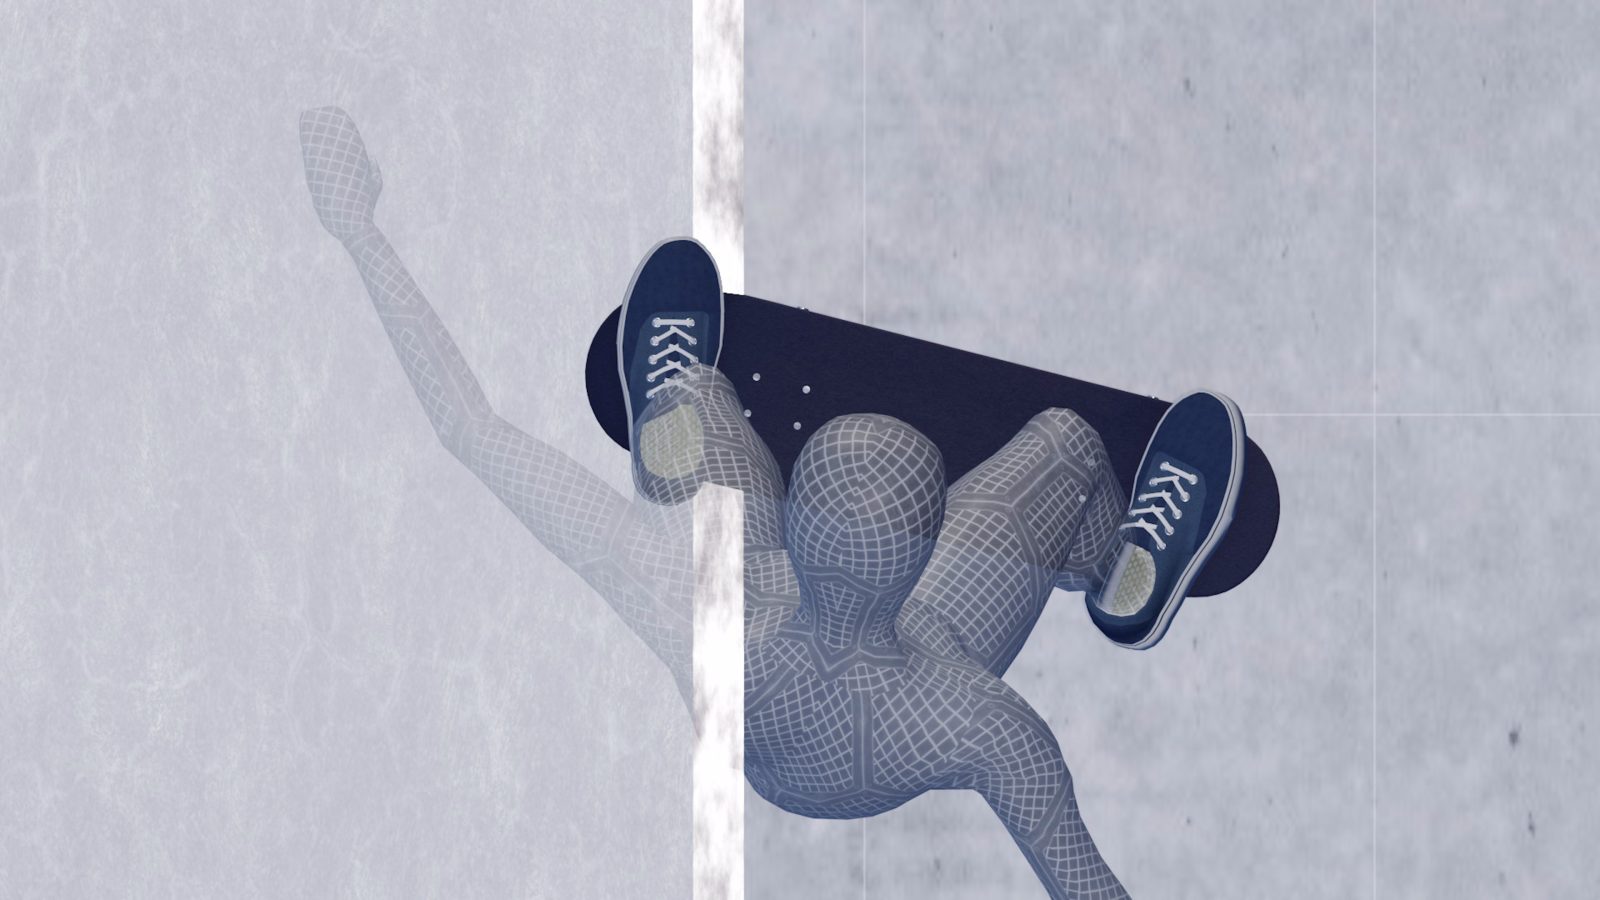
At the moment the board meets the obstacle, the heel side wheel hits the side of it, and the board will no longer be able to move in the same way. But since the board still has the momentum to move toward the obstacle, the entire board rotates around the heel-side wheel, and the board moves in such a way that it pushes itself to the base of the nose.
In addition, the body's center of gravity also has the momentum to move toward the obstacle, so it moves from somewhere above the board toward the obstacle. Furthermore, since you open your body just before the obstacle, it has the rotational inertia to keep rotating in the same direction, which, later, is transferred to your lower body and rotates the board while pushing the nose deeper into the obstacle.
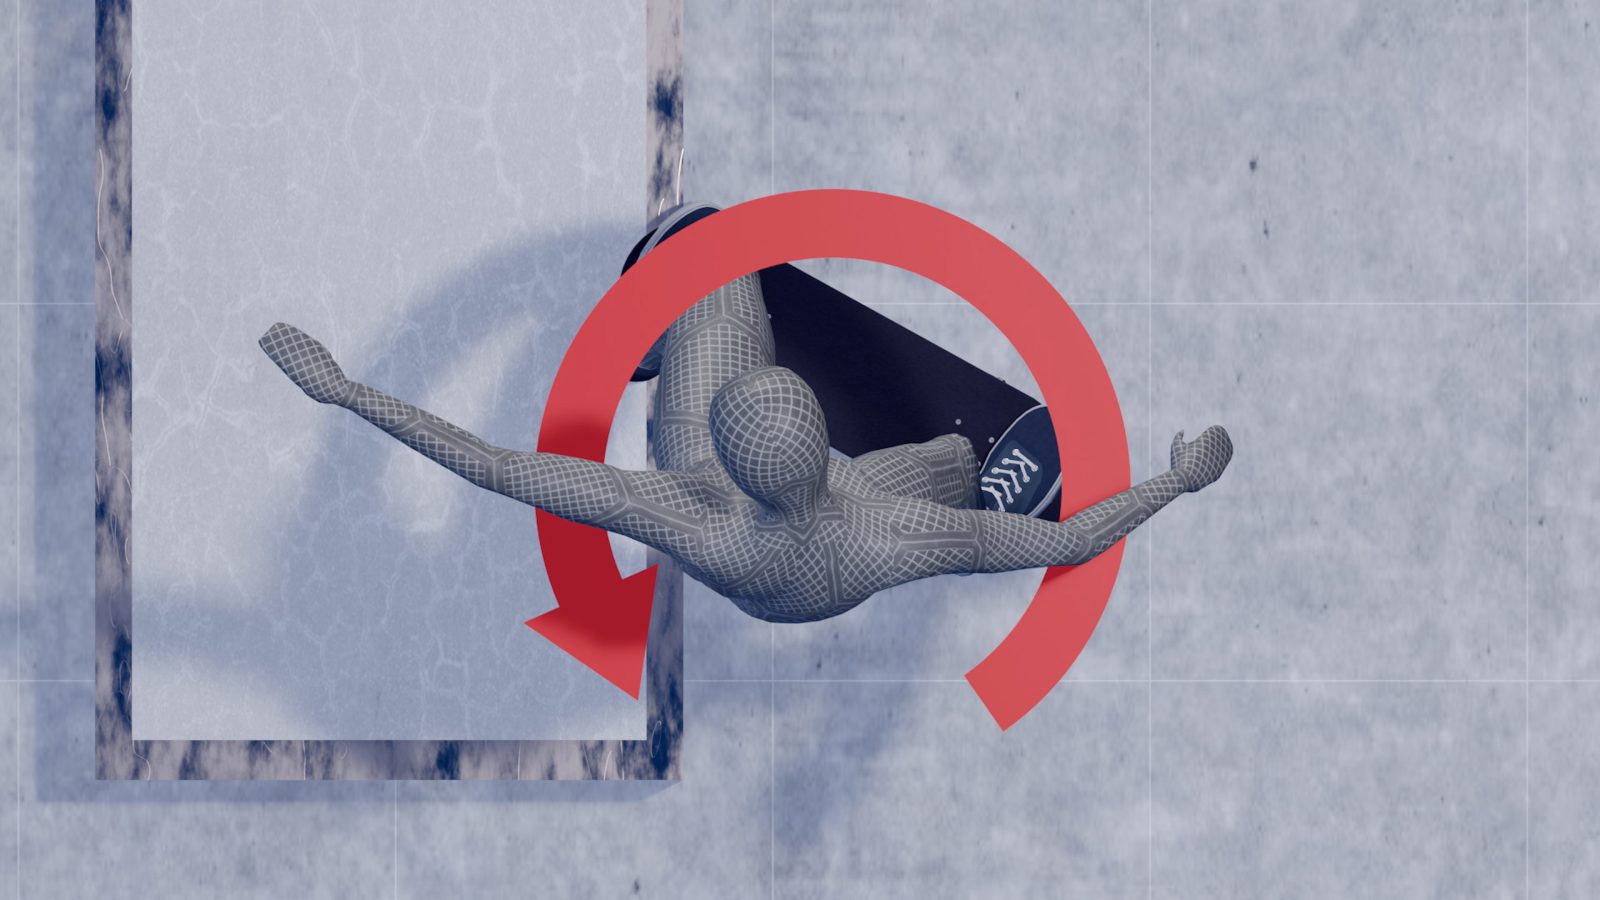
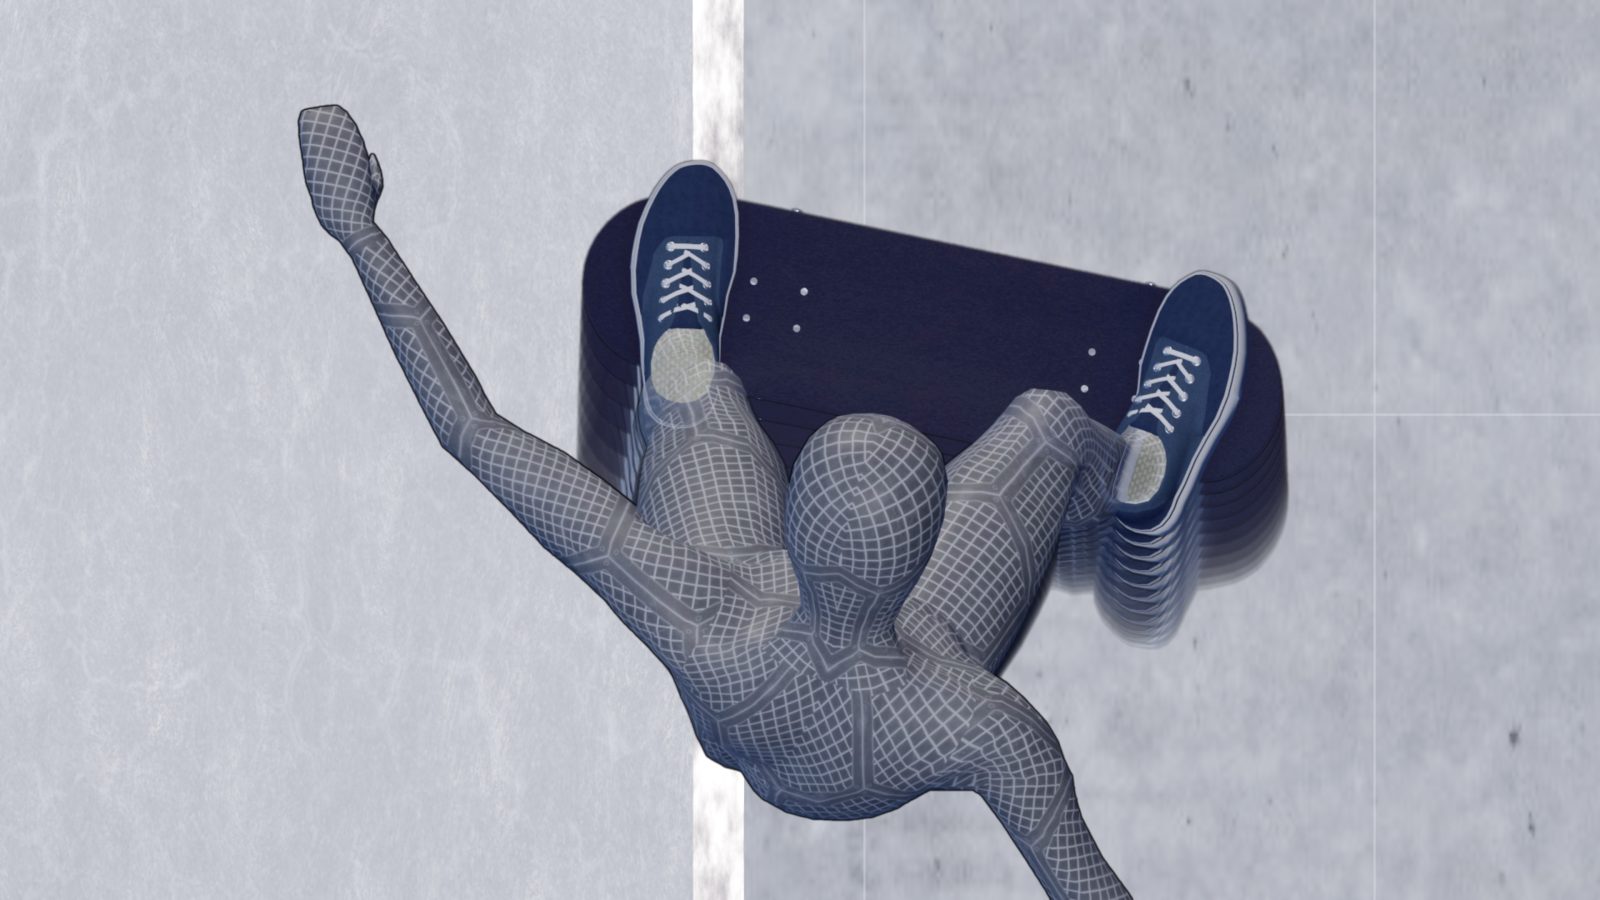
It is important to remember that the board is angled diagonally at the moment you ride up the obstacle and will continue to rotate up to 90 degrees as you slide. With this concept in mind, let's consider how to do this trick in the real world.

How to do this trick
Approach
First, let's take a look at the approach. In a Slappy Noseslide, the heel side wheel, the back of the nose, and, in some cases, the shoe come in contact with the obstacle, creating a large amount of friction. Therefore, you should go fast enough to slide a long distance.
If you get stuck to the obstacle, it is also effective to apply wax to the base of the truck and the sides of the obstacle, where large friction occurs.
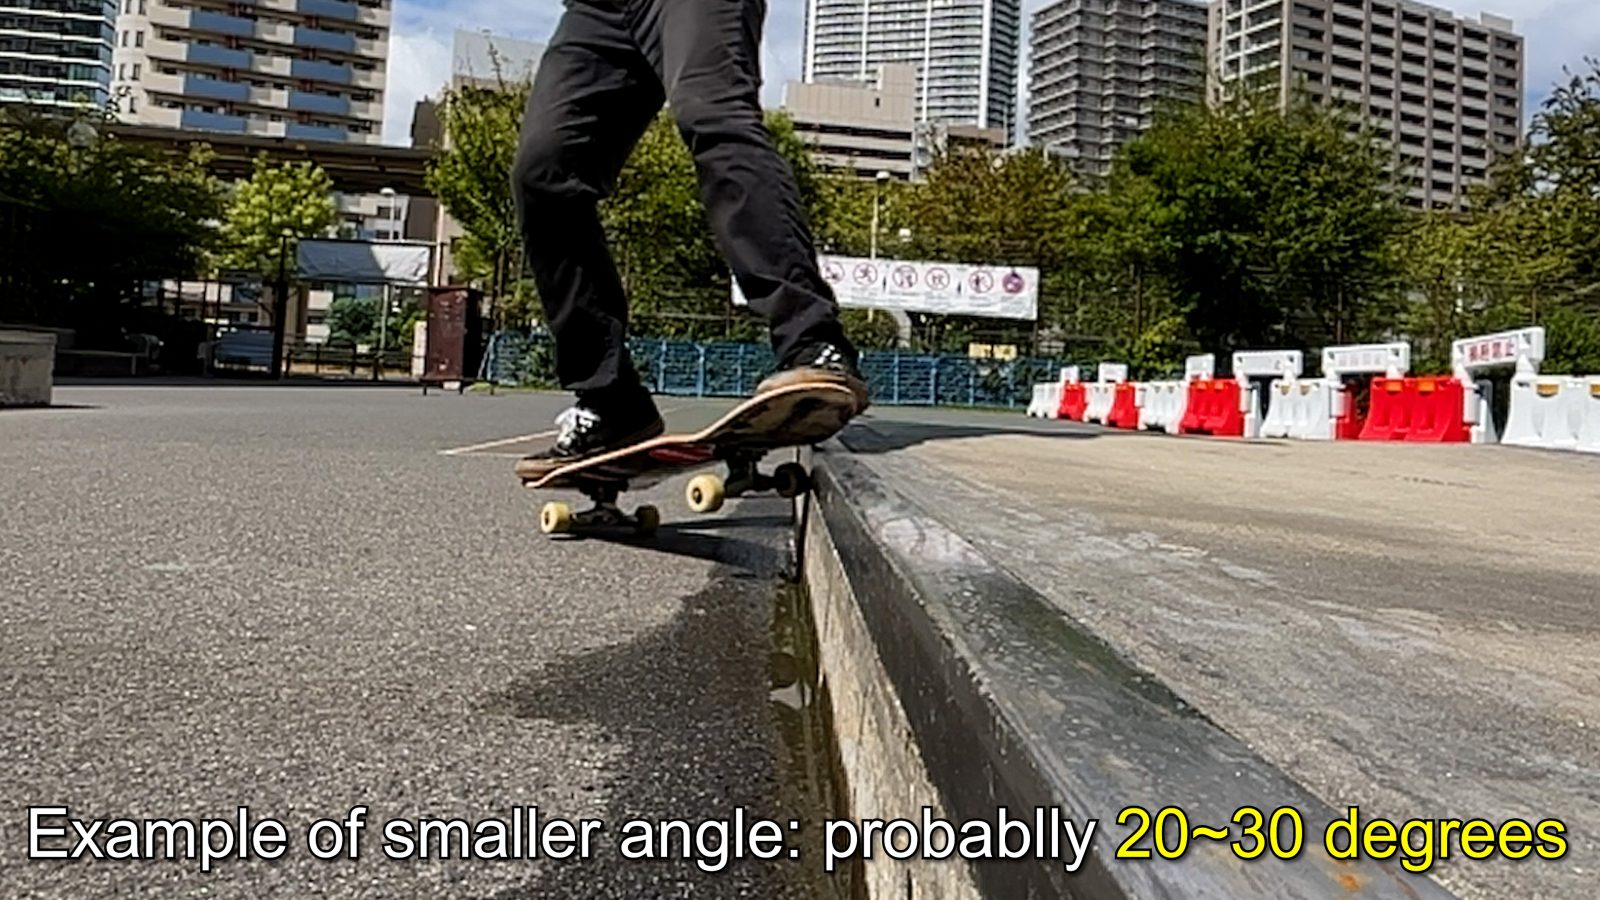
Although I mentioned earlier that you should approach the obstacle parallel to it, the actual angle is often about 10 to 15 degrees. If the kinetic energy working on your body is directed too far in the direction of the obstacle, you may end up getting over it. Try to keep the angle of approach as small as possible.
Rotating the board
However, if the angle stays at around 10 to 15 degrees, you will not be able to put enough weight on the obstacle and will slip off, so you must rotate the board just before riding up on it. In this clip, it looks as if I'm angling my board while doing a manual, but in reality, it's different from simple turning.
Let's try reproducing this action, which is key to the Slappy Noseslide. Try jumping while doing a manual. The tail does not have to reach the ground; it is enough if you feel your weight lighten.

Now, do a manual while moving, lift your weight as you open your shoulders. You should then see the board begin to rotate without an Ollie. And this is what makes a Slappy Noseslide a Slappy Noseslide.

Hanging the nose on the obstacle
Once you are used to the motion of rotating the board, try placing the nose on the obstacle. You want the nose to ride up the obstacle with the board rotated around 45 degrees.
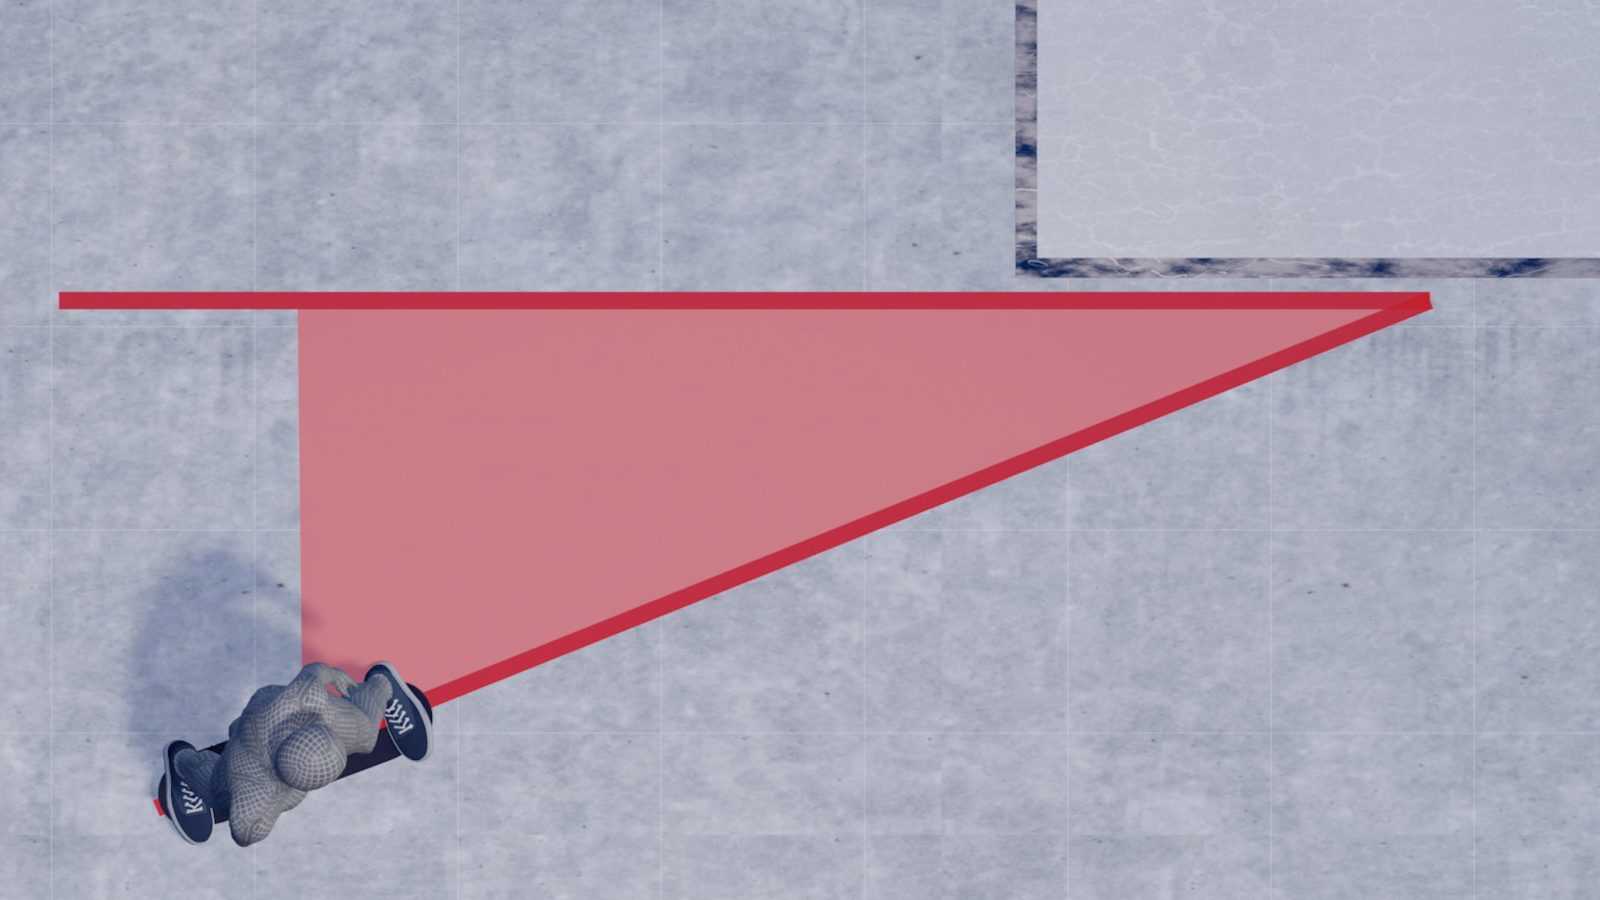
If the board slips off, try adjusting where you aim to lock in. From this animation, you can see that the further you extend your front foot, the smaller the angle between the board and the obstacle becomes.
In other words, if your board slips off and you want to increase its angle, try aiming a closer part of the obstacle than where you normally lock in.
However, depending on how well the obstacle slides, you may need to place your center of gravity behind the board to some extent and push it forward. If that's the case, move your back foot forward and adjust the angle of the board.
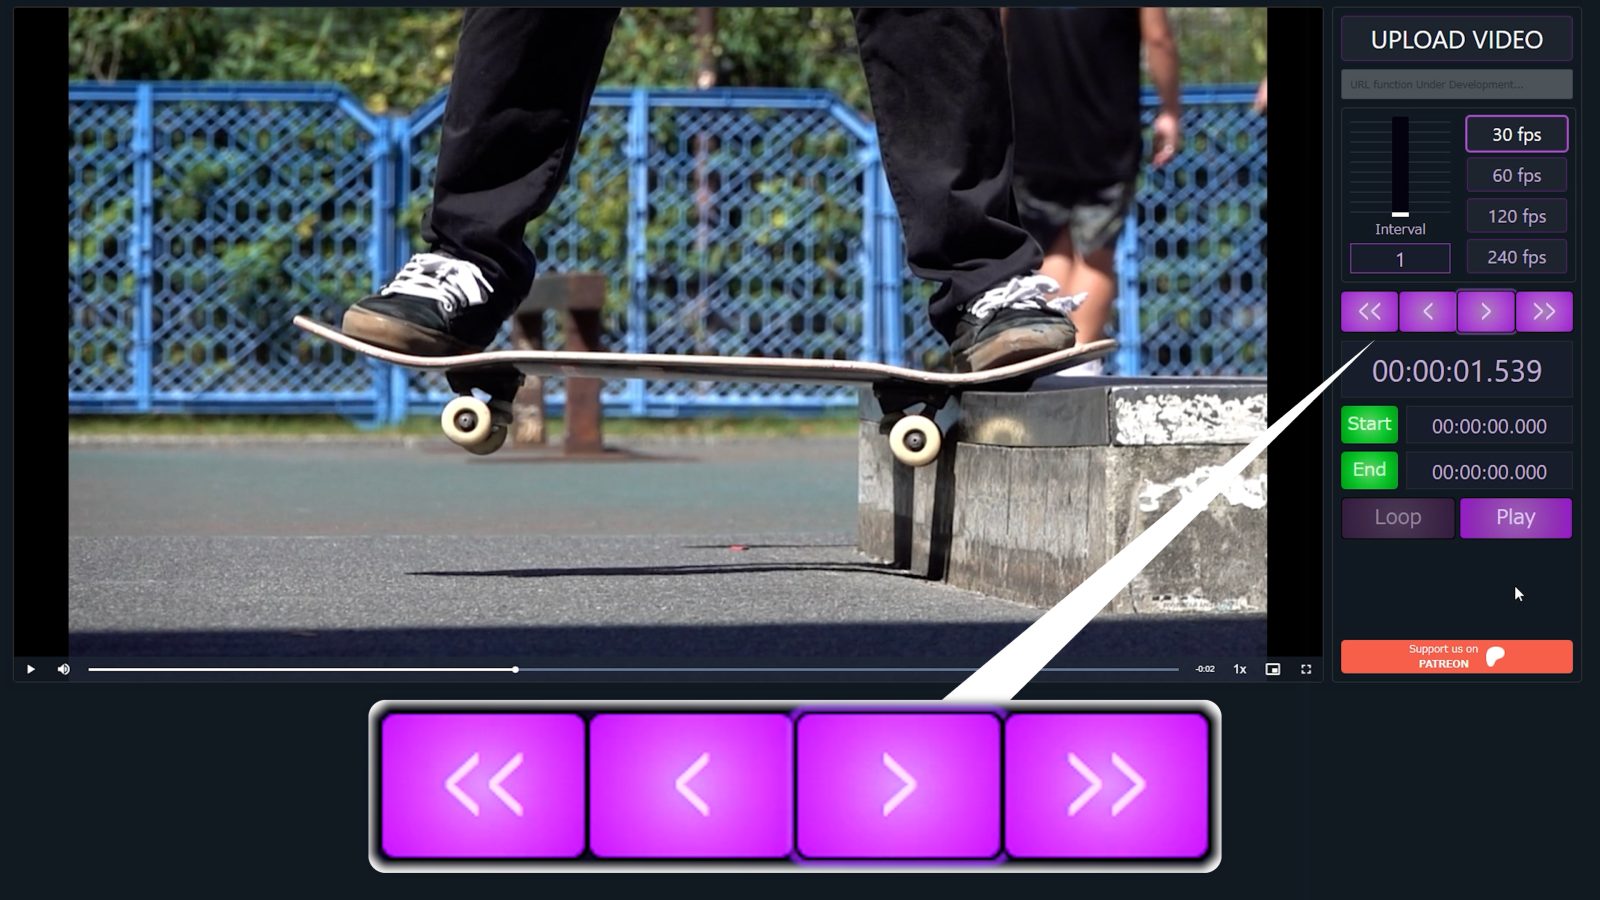
Frame-By-Frame player
And lastly, you can use a frame-by-frame video player with Whythetrick. This system allows you to move the video back and forth for a specified number of frames, allowing you to analyze the details of a momentary movement, such as a Slappy Noseslide.
The usage is simple. Upload a video in a file format that your browser can play, click buttons, or use arrow keys to send frames.This system is free, so please try it out.